
|
by Carlo Scodanibbio |
|
| home | course program | course leader | enquiries | enrol | testimonials | download |
|
Lessons
welcome1 - chapter a 1 - chapter b 1 - chapter c 1 - chapter d 1 - chapter e 1 - chapter f 1 - chapter g 1 - chapter h 1 - chapter i 1 - chapter j 1 - chapter k 2 - chapter a 2 - chapter b 2 - chapter c 2 - chapter d 2 - chapter e 2 - chapter f 2 - chapter g 2 - chapter h 3 - chapter a 3 - chapter b 3 - chapter c 3 - chapter d 3 - chapter e 3 - chapter f 3 - chapter g 3 - chapter h 4 - chapter a 4 - chapter b 4 - chapter c 4 - chapter d 4 - chapter e 4 - chapter f 4 - chapter g 4 - chapter h 4 - chapter i 4 - chapter j 4 - chapter k 5 - chapter a 5 - chapter b 5 - chapter c 5 - chapter d 5 - chapter e 5 - chapter f 5 - chapter g 6 - chapter a |
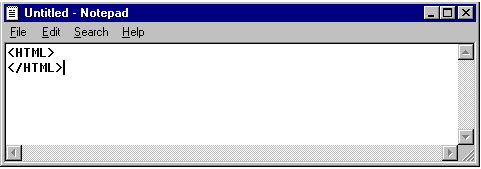
the html documentAnd now you can start. Open your Notepad [if you don't know where to find Notepad click here, for a quick tutorial (Enclosure 03)].Write: <HTML> </HTML> Your Notepad Window should look like this:  You have written the very first and most important HTML instructions for your Browser. Each of the two instructions above is called a TAG. The first is a STARTING TAG, and the second is a CLOSING TAG. To make a CLOSING TAG, simply add a / to a STARTING TAG. Most TAGS (but not all) come in similar pairs: STARTING TAG and CLOSING TAG, (or, Instruction Start and Instruction End). With TAGS you give instructions to your Browser: the TAG <HTML> tells the Browser: "Hey, Browser, this is the start of an HTML Document" (or "Page") and, similarly, the </HTML> TAG tells him: "this is the end of an HTML Document". |
|
previous |
shut-down this HTML story ! |
|